
January 22, 2011 (See also Companion Blog )
[Go BACK to Table of Contents] [ Next Experiment ] [ Last Experiment ]
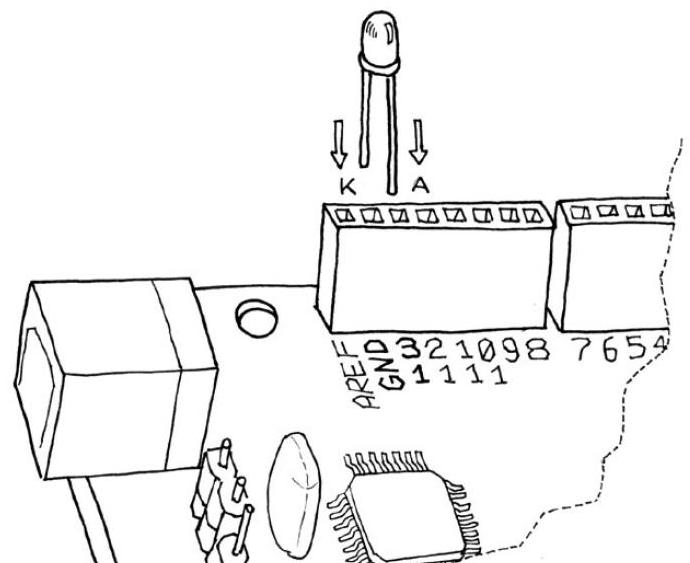
This is the first circuit recommended for all beginners with a microprocessor. I’m going to pirate the schematic, since the entire wiring consists of placing a single LED into two pins on the Arduino Uno. The documentation states that pin 13 (a true digital output) has a built-in resistor, so it is not necessary to remember to include the resistor to prevent burning out the LED. Ahem.
You are expected to know that the diode is directional, that the A lead is longer than the K lead, and what all this means. I am not including the computer code here as this example is trivial and I have not yet decided on what standard to use.
Theory:
The LED is connected to a microprocessor instead of a relay, switch or other standard controlling device. The microprocessor (Arduino Uno brainboard) is in turn connected to a computer. Various compatible commands (known as “sketches”) from the computer are “uploaded” to the microprocessor. The LED should blink in a fashion determined by those computer commands.
Practice:
The circuit performed perfectly, after several fitful starts concerning certain behaviors and operations of the microprocessor that were not detailed in the product documentation. Initial code made the light blink on and off at intervals of 300 milliseconds. The variables in the code were changed to experiment with intervals down to 20 milliseconds, where the individual flashes became too rapid to detect, up to 600 milliseconds with dozens of intermediate values for both “on” and “off” cycles.
Conclusion:
A successful first attempt, which although simple in concept, was a major step forward. Dozens of undocumented but essential aspects were force-learned. Most important appears to be how the brainboard remembers uploaded code when the USB cable is removed. This means there is some power source on the brainboard that is not mentioned in the manual, which also means it has a maximum shelf life.
Secondary conclusion: microprocessors are a hands-on adventure, lose the book for a while and get a microprocessor on your workbench as early as possible. Biggest lesson: develop a filing system to match your schematics to the your sketches, or you’ll meet with woe.
This experiment matches Arduino sketch A100401_01BlinkLED in my files.
Update April 26, 2012
You will find this same "blinky" experiment repeated ad nauseam on the Internet. Guys. It's been done! There's a real accomplishment to getting it working, since you must have mastered a number of skills unrelated to programming. Like downloading and installing the code processor (I think nerds call it an "integrated development environment" to confuse it with other IDE meanings). You'll have made port settings, and be able to find your way around the Arduino, no mean feat for the complete beginner.
But after that, there should be a reward posted for somebody to come up with anything new at the novice level. As I progressed through ever more complicated Arduino code, I began so suspect a conclusion that is not addressed in the available material. Hypothesis: can the Arduino can be programmed to duplicate the operation of any combination of discrete components and logic gates? Here is a quad NAND gate I built before programming the same operation using four simple IF-THEN commands.

Go BACK to Table of Contents